

This turned out to be a fun and simple project. I did realize one thing I would have done differently; use foam to lift the miniature scene up about an inch (depending on the jar) to avoid the distortion the curve in the glass causes.
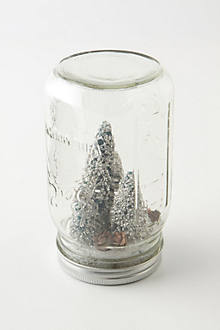 |
| You can see that the ones from Antropologie are raised alittle from what looks like foam. Follow the link to get a better view. |
1) Gather supplies
I also wish I would have come up with some fun and creative scenes. I didn't give it much thought I just figured I would use trees and whatever else I found at Hobby Lobby. I didn't find much. I bought some little picket fences by the doll house supplies. Then I went to the model section...no they don't have a super model section if that were the cause Hobby Lobby would be overrun with guys instead of a place they avoid like the plague. On the asile with the makings of model towns etc. I found the trees but they all came in packs and were more pricey then I would have liked. I did however have a spark of creative inspiration while I was there checking out what was available for my snow globes...this is where I wish I had given this more thought early on. There were miniature dinosaurs for sale in packs it would be totally hilarious to have the dinosaur chasing Santa or eating Santa as the snow globe scene...don't you think? I will be keeping all of this in mind as I hit antique stores etc. and see what I can find through out the year.

2) Glue your trees together. Then glue your scene down on the lid.
* glue foam down first if you want to add it*
3) While your scene is drying on your lid; fill your jars nearly full of water (distilled is preferred) and then add glycerin, I added about a 1/4 teaspoon. Add glitter about a Tablespoon.
4) I spread glue on the lids after my scenes were done drying and then poured glitter over it. Let dry.
5) Put your lids on. BOOM done!!!


See you tomorrow ;) I have a project in store for tomorrow that I am super excited about.
I love this! I may not be able to wait until Christmas next year to make one :)
ReplyDelete