Showing posts with label service ideas for kids. Show all posts

Wednesday, April 2, 2014

10 Ideas to Get You Started!

Who doesn't like lists?! For Service Beans (I will be doing posts detailing the program soon) for the past few months I have been putting a list of new service ideas on the back of the record sheets every month. At a committee meeting we were brainstorming easy ways to give students and families service ideas. One of the committee members threw out this genius idea and I have been putting a list on the back of the record sheets every month. Having a solid committee is pure awesomeness. Why it took me months to share it on here I don't know, but it finally hit me and so here ya go!


To print this page go here and don't forget to Pin it!

What I do when I print up a new record sheet is sit down with my family and we go over the list of ideas and choose what we want to do when, and put it on the calendar. Doing as part of Family Home Evening on Monday's would be great or during Family Council would be great too (check out this amazing post on family councils). It works really great to sit down and plan out what we are going to do which means most of it actually happens. It's also super fun to see what your kids want to do and their enthusiasm is contagious. If nothing else print it out and put it on your fridge. I also hope that if you like it you'll share it with others so they can catch the service bug.

One last note...The SIP Project was featured on Christi Madrid she is a vivacious and bright women (I don't think I have ever felt the need to describe someone as vivacious, but that's how I see her). I have been following her site for sometime and was honored she thought of me. She started a fantastic new series called "Light It Up". Need some sunshine?! Head on over then!

Alright my friends,

Scatter sunshine!


Thursday, November 8, 2012

Dish and serve tiered food "cakes" and Tostada recipe


Let's face it, not everyone loves to cook, if they did there wouldn't be restaurants EVERYWHERE. Morena from Morena's corner happens to be one of those people. She also happens to be super sweet, I can imagine her being very optimistic the kind that it rubs off on all those she is around. Though she did not put together a typical Dish & Serve post it does give those who don't fancy themselves "cookers" as my 6 year old would say a great idea on how to use food to show love to others. I got this post in my e-mail the same day I got an e-mail my daughters teacher asking that those of us who are in a position to donate food for Thanksgiving baskets should. It will go to students and their families at the school who are in need of them. Immediately I thought that using Morena's way of jazzing up food to be donated would be a fun way to present the Thanksgiving food, baskets or not. If they are doing something like this at your child's school volunteer with your kids to put them together and jazz the food to be given out. Or organize something like this at your kids school or church or wherever. Here is what she did...


"I was thrilled when DeAnn invited me to participate in her dish and serve series!  I'm a crafter, not a baker, though, so I put my own little spin on things. My family made tiered food "cakes" to donate to our local food bank.  I hope you like this idea!


My goal with this project was to encourage my children to think about the people receiving our donation and the impact it would have on them. We talked about how it must feel to have to go to a food bank to ask for assistance.  It's scary to not know where your next meal will come from. It's stressful to worry about food and bills.  Some people might even feel a little embarrassed to have to ask for help.  What could we do to help them?

We decided that it would be fun to make our food donation look like tiered cakes.  Hopefully making the recipient smile and feel happy for a bit!   Each child made their own "cake".  We started with a silver platter from Dollar Tree.  Arrange the first layer of cans or cereal boxes, and secure with decorative tape.  Arrange the second layer and secure with tape.  Add a third layer if desired.  Wrap the cake with various ribbons and tie into bows.  Attach hand written notes.


 My children wanted these to look like gifts, so after I took these pictures, we wrapped each tower in paper and tied the top with a bow.  We will deliver them to the food bank this weekend.

My kids are happy to be helping someone in our community, and I'm glad that this activity encouraged them to stop and think about how others are feeling.  I hope it was a great learning experience for them!

Thanks for letting me share with you!

 
Food banks are in desperate need of donations. The demand is going up while donations are shrinking and altogether drying up, a nasty catch 22. Can't donate?  Then donate your time.


I saw that Morena's daughter was making a tired canned bean "cake" and it made me think of one of my favorite bean recipes that is super fast and healthy.
 
I got this recipe out of Cooking Light magazine, I think. I can't remember what they called it so I think I will re-name it Tostada New Mexicana Stick To Your Ribs Deliciousness, Haha.
If I eat two of these bad girls fully loaded I am FULL! So one per kid and 1-2 for adults.
Meatless Monday: Ranchero Breakfast TostadasPre-heat oven to 400. Take 6-9 corn tortillas and spray with cooking spray on each side or olive oil or butter. Place on cookie sheet if you use 9 corn tortillas you will have to overlap them a bit. Place them in the oven for 3-5 mins. When done take them out of the oven and flip the tortillas.Then place your beans and cheese on the tortillas and place them back in the oven for another 5-8 mins or until the cheese is melted. While they are cooking in the oven cook your eggs (two per tortilla was my preference). When done cooking in the oven plate your food and then place the eggs and avocado over the melted cheese. Of course you can add green chile or red chile or both as is my preference :)


Thanks for stopping by and be sure and check out Morena's blog.

Much love :)

Sunday, July 8, 2012

SIP Summer Camp Super Bubble Kit

Hello, Blogland and SIP fans! I'm DeAnn's sister, Amy, and I volunteered to take over this week for the SIP Summer Camp while she prepares for a wedding shoot. I have a little blog (ABC Delites) that chronicles life with three boys and a big boy (the hubster) along with some party planning ideas thrown in. WARNING: I have follow through problems this week. I had a fantastic idea in mind, one I saw on Pinterest and thought was particularly fitting for where we live. However, with the 4th of July and my hubs birthday, the week got away from me. I purchased everything I needed, but finding the time to put it together has been a challenge for me. So, I'm going to tell you our plan and I'll update later with pictures.

So this was my grand plan: Super Bubble Kits to beat some of the summer boredom that plagues our apartment building. We've been in our apartment for three months and the fire alarm has been pulled 14 times and counting. When we take walks or head down to the playground, I see kids that are clearly bored. This is a decent area, but it's a lot of working parents and older siblings taking care of the younger ones during the day. So, at least for the younger kids who my kids can identify with, we are going to make super bubble kits and hand them out. I don't care who you are, big bubbles are awesome. Shoot, little bubbles are fun, so SUPER bubbles are SUPER fun! I saw the idea on this blog via the beloved Pinterest. I bought enough materials for five kits.

Per kit you need:
2 dowels three feet in length (paint a fun color or keep au naturale)
Bowl (I bought a frisbee to double as a bowl)
2 eye screws
1 washer
12 feet cotton cording cut into two pieces 8 feet and 4 feet
Bottle for Super Bubble Solution
Sack to put it all in

You screw in the eye screws into the ends of two dowels. Thread one end of each length of cotton cording through the eye screw and tie a knot through one dowel. Slip the washer on the 8 foot length of cording then tie both lengths through the other dowel.

Super Bubble Solution:
12 cups water
1 cup dish soap
1 cup cornstarch
2 Tbsp baking powder (not soda)

Stir gently, do not create bubbles. Let sit for an hour, or even better, overnight before use. For longer lasting bubbles, and I couldn't make this up if I tried, there is a secret ingredient. I didn't notice on the original blog post until much later that a secret ingredient could be added. Now this is a family oriented blog, and I will keep it as such, but this ingredient is pretty grown up! I have never looked for this particular item at the Dollar Store, but alas, I found it and purchased it awkwardly at the insistence of the original post. Enough suspense: secret ingredient = personal lubricant. I never have bought anything as an adult that made me blush, but knowing it's purpose was not the intended use made me feel like a stupid teenager buying Midol, not wanting anyone to know I might have cramps, LOL! Dissolve the secret ingredient in warm water then add to bubble solution. It will be cloudy, just stir occasionally until all the cornstarch dissolves. Also included on the blog post are darling printables to make this a super duper cute gift.


I have talked to my boys (Cash, 6, Dodge, 3 and Easton, 1 who doesn't count just yet ) for a few weeks about what we are going to do to spread some summer fun around where we live. When we pass through the courtyard and see kids with Sharpees at the picnic tables writing on them or breaking glass bottles because they are there, I don't think it's because they are the bad seeds of the bunch, it's the old adage of idle hands do the devils work. My boys know that what those kids are doing is wrong, but what I want my boys to do is not judge them. I want them to learn that they don't need to join in on the juvenile delinquency, but they can invite the ne'er do wells to do something else; an alternative to destructive behavior. I want my boys to influence good without discounting the worth of others that maybe make different choices. They are excited to make new friends by sharing a gift that they helped make. I have invited some cousins to come along and help us find some candidates for our super bubble kits and I believe it will be a fantastic experience for them all. 

Sidenote: DeAnn's craft project post last week is something I also have in the works. It's a board with a pocket that holds cards with words of encouragement and love in them. We met a lady just down the hall from us that is obviously sick. Every time we see her she has bandages on her arms like blood was drawn. She walks very slowly and just doesn't seem like a whole, healthy person. However, she always smiles and makes small talk when she sees us. I just love the idea of giving someone the opportunity to have a little encouragement whenever they need it, right on demand. Who doesn't like a little instant gratification once in a while! I promise I will update all my little endeavors with pictures as soon as we are done :)

Thursday, February 23, 2012

Plant some flowers guerrilla style-Hello Hydrangea guest post

I love (this word gets thrown around a lot in blog land but I really mean it) Lindsey's blog Hello Hydrangea (Go to her 'about' section to find out how she choose the name for her blog) I just love truly creative individuals like Lindsey. Enough jabbering...don't take my word for it, check out this post and then hop on over to her blog. She had an AWESOME post on cinematography...wow that's a mouthful...

I am so glad to be here at The SIP project blog! Service has always been important in my life. I remember waking up early on a Saturday to clean and weed a widow's yard with my dad - he has been a great example to me of service because he follows Christ's example. It was a great challenge to combine my love of design with a service project from DeAnn! An artist I admire came to mind as I was pondering a project.


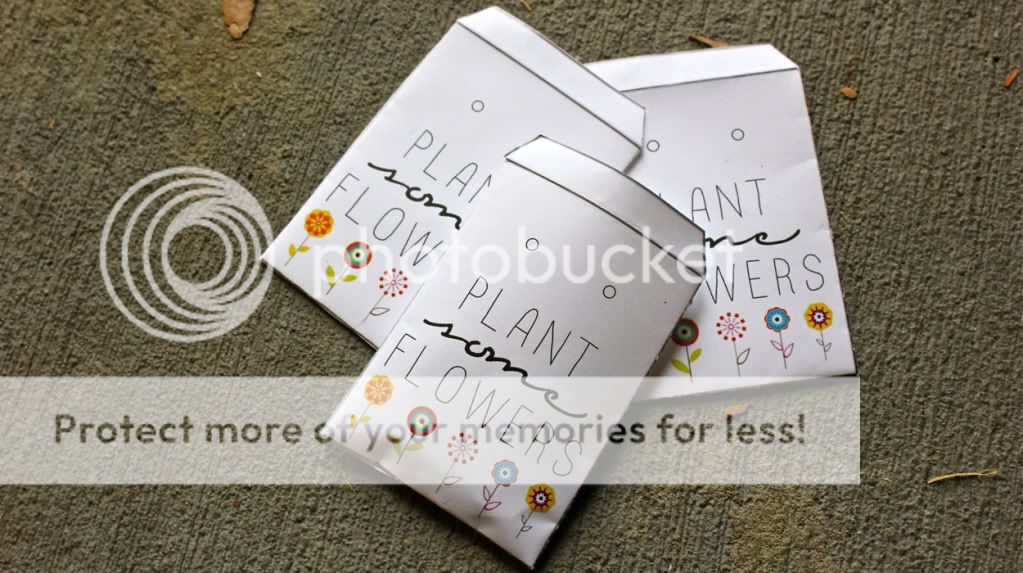
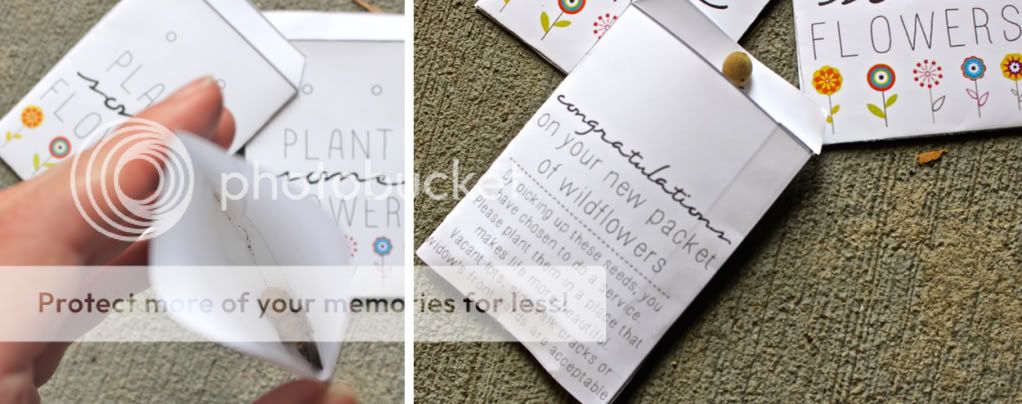
Ashley Mae Hoiland inspired me to use this idea and do a 'service project' for the world. I created a custom flower packet and left it in areas where passer-bys would find them. This service allows others to continue the service by planting wildflowers in places that need a little more beauty.


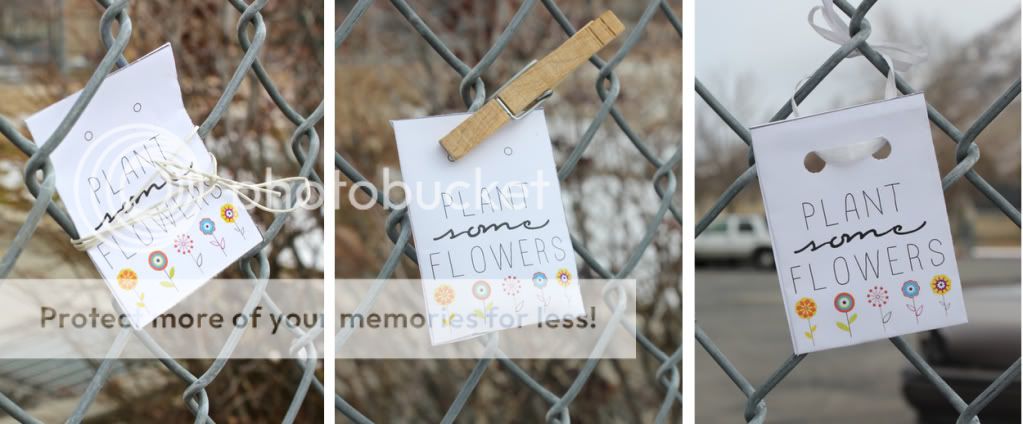
Anyone can download the flower packet template here. All you have to do is print them out, glue the sides together and fill them with your flowers of choice. Then leave them in areas for others to find! There are a few ways you can attach them to fences, trees or benches - just be courteous and make them easy to take without leaving anything behind. Here are a few ways:


Thank you again, DeAnn! I love being involved in uplifting blogs!

I can't wait to make these with my kids! I know they will love it! This would be super fun to give to all the kids in my daughters kindergarten class...hmmm...wheels turning. 

Where are you going to leave your packets of seeds??? Oh...and what kinds of seeds are you going to put in yours...I'm thinking Holly Hock seeds, one of my faves!

                                                               You might also like:
Rock photo holder DIY project

Cumorah's Vogue portraits

Mullen family portraits and service project